Toe Up Socks for Beginners

Coming soon, I will have a basic toe up sock pattern available in eBook format. Included will be info on how to cast on, work magic loop two at once (or one at a time), increasing, decreasing, short rows, and how to do a pretty bind off. I’m hoping to have this ready by the end of the month. Included in the eBook will be a hat pattern that uses all the techniques for a sock, but using bigger yarn & needles making it easier to see what you are doing (and also get it finished faster!) And also a basic sock pattern to practice your skills is also going to be included.

image

Wet Blocking in Summary

Here’s my quick little summary on how to wet block hand knits.  There are different methods of blocking, I will cover others at a later time, for now here’s the method I use most.

Wet blocking-  Fill sink or basin with tepid water, adding a no rinse soaking detergent if desired.  There are many types of these no rinse cleaning agents, two popular ones made specifically for hand knits are “Eucalan” and “Soak”.  Gently set the garment into the water, submerging it with as little agitation as possible.  Allow the piece to soak thoroughly.  Drain the sink or basin while supporting the item to prevent stretching.  Gently squeeze out excess water.  To hasten drying time, you may roll the piece in an absorbent towel, being cautious to not stretch the fabric unintentionally.   Next lay the piece out on your blocking surface, pinning it to the measurements in the pattern schematic.  Allow to dry.

What I’m Wearing

Recently a fellow blogger posted a super cute pic of herself wearing a pretty shawlette http://fuzzynoodleknits.blogspot.com and it made me think “what a great idea!” I mean, we crafters often post pics of our FO’s but what about “where are they now?” Well, I sure have a heck of a time taking pics of myself, but here are two from earlier this week 🙂

Ha ha, didn’t realize until I added pics, but both of these are my own designs.

image

image

Cute as a Button

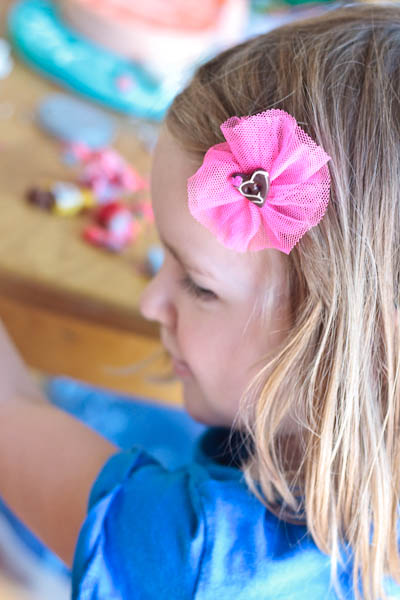
I have to admit, I seem to have a little bit of a problem with my addiction to buttons.  Not just regular ol’ buttons from the store, but TessaAnn boutique buttons.  After seeing a number of examples on her facebook page, I decided to try my own hand at using the buttons for something other than, buttoning!  Here’s a quick tutorial.  You could use these on a garment as a decoration (like on a hat) or as a hair accessory as in my example.  I did not add anything in this tutorial about adding a clip, headband, etc. because a) I think you can probably figure that much out on your own and b) I didn’t really have my bobby pin on there as I would have preferred (with hot glue) and didn’t want to show you my have done method 😉


Get all your supplies ready-

1
5-6″ of elastic with tulle sewn in (mine is from Joann’s from Simplicity, but you could easily make your own)
Thread (I used white for the rosette part, clear for sewing the button on)
Needle
TessaAnn Button(s)
Less than 15 minutes of time without children begging for snacks or tv time (optional, but preferable!)

2
Thread the needle and begin stitching from one end of the elastic ribbon to the other.  I didn’t stretch it out a whole lot as I worked.

3
Go all the way across.  Connect the two ends and pull tightly (not so tight that you break your thread!)

4
Flatten it out a bit so you can see where your center is.  Decide which button to use.

5
Attach button.  E.A.S.Y.

edging choices for a blanket

I’m still working on my Pop Blanket from TinCanKnits and thought I’d add my thoughts on how I might finish the edging on my blanket. The designer clearly put a lot of creative thought into the design, so I by no means intend to change the overall pattern concept. Please take any of my suggestions with a grain of salt as they are more just an outline of my own thought process and it being spout out online 😉

The pattern as designed leaves a rustic edge which actually looks quite fabulous. However, I had two questions for MY version, specifically a) do I want the raw edge (which curls) on my finished blanket and b) is there any way to add some size to this blanket without having to make a gazillion more blocks! Don’t get me wrong, this is a great project, but having already done 13 blocks I can tell you that I’m going to start getting bored after the next dozen and it won’t yet be as big as I want for throwing on the couch.

I decided to experiment with a few different options on my sample. NOTE/TIP: Any stitches picked up are done from the WRONG side, this is the only way to maintain the same lines used in the design to seam the blocks together. I think doing it this way will be the most cohesive way to maintain the design. But do what you like best, its your project 🙂

Raw edge in pattern as written.

Several rows of single crochet with the same diameter hook as the knitting needles.

Applied I-cord. (3 sts)

Pick up and seed stitch several rows.

Pick up and st st a couple rows then a couple in garter before binding off.

Not sure which one will be my final choice. But the crochet was my original desire, but now I’m not sure I like the change in texture for this design. The Icord looks clean and finished, BUT I needed to pick up more sts as I went or do it more loosely because it was not stretchy enough. Seed st seems like a good choice, as does plain garter, but I wouldn’t add the st st in again unless it was for a more significant size because just doing the couple rows still rolled in a lot which defeated the purpose of solving question A as stated above.